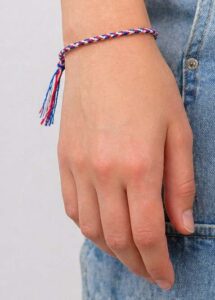
Red, White and Blue Friendship Bracelets
Equipment
- 1 pair of scissors
- 1 ruler
- 1 pencil
Materials
- 1 piece thin cardboard (example: cereal box)
- embroidery thread (from 1-7 colors)
Instructions
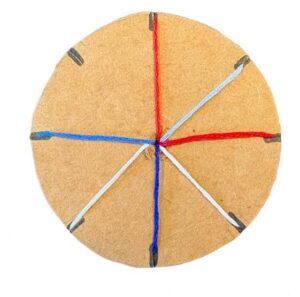
Mark your slots
- Use a pencil and ruler to draw 8 evenly spaced lines, like a compass (N, NE, E, SE, S, SW, W, NW).
- They don’t need to be perfect, just close.
- Cut a small slit (about 1/4 inch) at the end of each line.
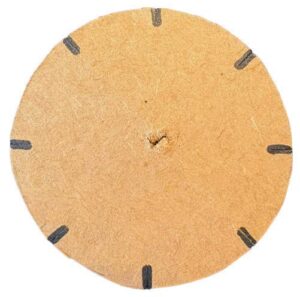
- Cut a small hole in the center of the circle.
Clean it up
- Erase or remove pencil marks so they don’t transfer to your thread.
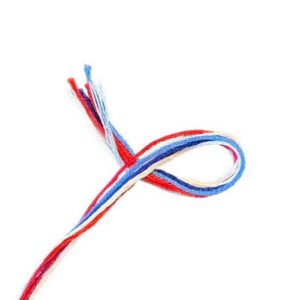
Prepare your thread
- Cut 7 pieces of embroidery thread, each about 20 inches long.
- Tie them together at one end with a knot, leaving a 2–3 inch tail for finishing.
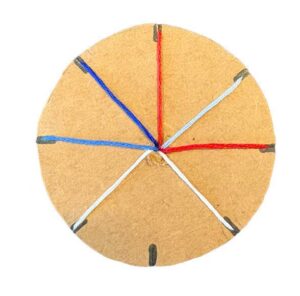
Load the wheel
- Feed the knotted end through the center hole from the back to the front.
- Place each strand into a separate slit, leaving one slit empty.
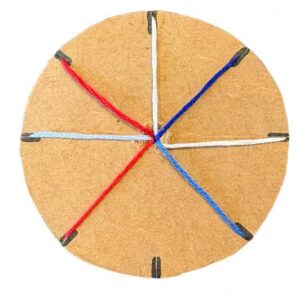
Start Weaving
- Hold the wheel so the empty slot is closest to you.
- Move the third strand to the left of the empty slot into the empty slot.
Rotate and repeat
- Turn the wheel so the new empty slot is closest to you (move counterclockwise).
- Again, move the third strand to the left into the empty slot.
- Repeat this pattern continuously.
Finish
- Keep going until you have about 2–3 inches of thread left.
- Tie off the end with a knot, just like the beginning.